This blog is part 1 of 2 and covers correct positioning on the bike for comfort and power maximization. Part 2 of 2, which will be covered in detail at a later time, will cover aerodynamics.
Before you begin to position your body on your bike properly, you must have the right equipment. I hate to say this, but if you want to race in a Time Trial..buy a Time Trial (TT) bike. Don't think you can slap-on a set of "clip-on" aero bars to your road bike and that's good enough. It will help but in no way does it compare to the advantages of a bike designed for Triathlons or Time Trials. What's the BIG difference between a road bike frame and a Time Trial frame? The seat tube angle is steeper on a TT bike. Why? Because it's easier to pedal in the lower shoulder (flat back) position demanded for aerodynamic efficiency with the saddle farther forward.
The first thing you want to adjust on your TT bike is your saddle height and your saddle position (fore/aft). There are many ways/methods to do this. The easiest way to obtain your correct saddle height is to measure your inseam and multiply it by a particular factor/number such as 0.883. (BTW, saddle height is measured from the center of your bottom bracket to the top of your saddle, along the seat tube) However, there are contradicting methods on what factor/number/percentage to multiply this measurement by to obtain your correct seat height. Another way is to measure your knee flexion with a goniometer. A goniometer is just a fancy name for a device that measures angles. Most bike shops use a goniometer. Since I'm a photographer, I like to photograph the rider (on their bike) while they're pedaling and measure the knee flexion angle on the photo/picture with a protractor. I find that a dynamic measurement is much more accurate than a static one. (Just like a dynamic balance of your car tires is superior to a static balance.) (BTW, you need a fast camera/lens to stop action with a flash indoors.)
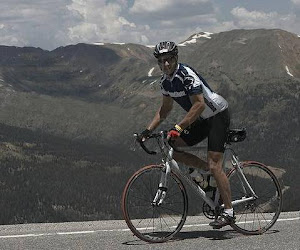
Pictured below is a photo of Jason Wood. I measuerd Jason's knee flexion angle to be 26 degrees. Any angle less than 25 degrees of knee bend at bottom dead center, the kneecap, the fulcrum for the leg lever, loses contact with the joint, and you can NOT push as hard without the fulcrum. The result- power loss. So, Jason is ok with respect to knee flexion angle. (I believe his recommended saddle height, via calculation, was 33 inches and his actual height was 33.5 inches- so close enough for now.)

Correct seat position (fore/aft) is normally derived by dropping a plumb line from the rider's forward knee when the feet are positioned at 3 and 9 o'clock. Normally, the plumb should intersect the pedal spindle when the seat is positioned correctly. However, for an ideal aerodynamic setup, the rider should bring the saddle forward 1-2 inches from the knee-over-pedal standard road position. You can see in the photo below that Jason's knee is over the pedal in the standard road position. (BTW, his crank arm length is 180mm which is longer than standard). Therefore, he could probably move his seat forward an inch or so..or shorten his crank arm length. Moving the saddle forward also avoids bunching up at the hips when the torso is horizontal- which is good. Remember, when you move the seat forward you MUST raise the seat to compensate for it. The general rule is: for every inch forward you move the seat, raise it 1/2 inch.

The next thing you want to check is your handlebar position. Handlebar position is mostly personal preference. Keep in mind however, that you want to ride as low and narrow as possible to achieve the best aerodynamic position. To achieve a horizontal chest, the line from the center of rotation of your hip to the center of rotation of your shoulder should be between 6-8 degrees above horizontal. This is also called the "torso angle". You can see in the top photo that Jason has a 6 degree torso angle- which is good. Jason's hip angle, measured between the lines formed by the center of the knee (when at its highest point in the pedal stroke), the center of rotation of the hip, and the center rotation of the shoulder, is also 35 degrees. A hip angle of 40 degrees is optimal as it opens the hips more and frees the legs.
Normally, crank arm length is determined by multiplying the riders inseam by 21.6 percent. However, for Jason who is 6'6" tall and has a 94cm inseam..that would equate to a 200mm crank arm length. I don't even think they make 200mm crank arm lengths..so perhaps 180mm crank arms is as good as it's going to get for crank arm length.
For optimal aerodynamics, you want to bring the arms/elbows close together to reduce frontal area. Ideally, you want your elbows as narrow as your knees. You also want your arms/elbows within your hips. You can see from the frontal area view of Jason he has great arm/elbow/knee positioning on the bike. Jason doesn't know this yet, but when we get on the road for our CdA test, we're going to experiment with his hand position. I think I'm going to have him raise his arms/hands to see whether that raises or lowers his CdA.

Jason has a relatively flat back in his aero position (see middle photo). To achieve a flatter back requires rotating the pelvis forward, moving the seat forward, increasing hamstring flexibility, and bringing the belly button closer to the top tube. With a flat back you want your shoulder angle to be close to 90 degrees. Jason's is 105 degrees (see top photo). If we move Jason's seat forward a bit, which I recommend, he'll get closer to that 90 degree mark.
Jason's aero/elbow pads are postioned correctly- somewhere between the end of his elbow and the middle of his forearm. I also measured Jason's weight distribution on the bike.
Ok, so lets summarize. I'm recommending that Jason move his seat forward one inch and raise it 1/2 inch. This will open up his hips a little, improve his shoulder angle and flatten his back.
STAY TUNED for Jason's on-the-road Coefficient of Drag (CdA) test results. I will be able to measure Jason's continuous CdA with my iBike Aero and Power Tap hub. I call it the poor man's wind tunnel. Hey, it's faster/cheaper than driving down to the A2 Low Speed Wind Tunnel in North Carolina. (Plus, unlike the wind tunnel..I get to experiment on the time trial course I'm racing on.) This will give me on-the-fly continuous CdA which will allow me to optimize Jason's position even more. Remember if you want to go the fastest you can, you have to consider COMFORT+POWER+AERODYAMICS. I just told you how to optimize comfort and power (via biomechanical optimization)...next blog I'll tell you how to optimize aerodynamics.
Power ON! Coach Rob


No comments:
Post a Comment